
Navigating Oslo's Winter Wonderland with an eSIM
Spending a week in Oslo for its winter sports scene can be incredible, but it's easy for your data budget to spiral. My last 8-day trip to Oslo, split between Holmenkollen and the city center, cost me exactly €280 on accommodation (the Anker Hostel was €35/night, not bad for Norway) and food (mostly Rema 1000 groceries, plus a couple of cheap kebabs). Data for those 8 days? A cool €28 for a 10GB regional eSIM. That's €3.50 a day for reliable connectivity. This isn't some abstract figure, this is real money saved that could go towards a better hostel or an extra plate of krumkake.
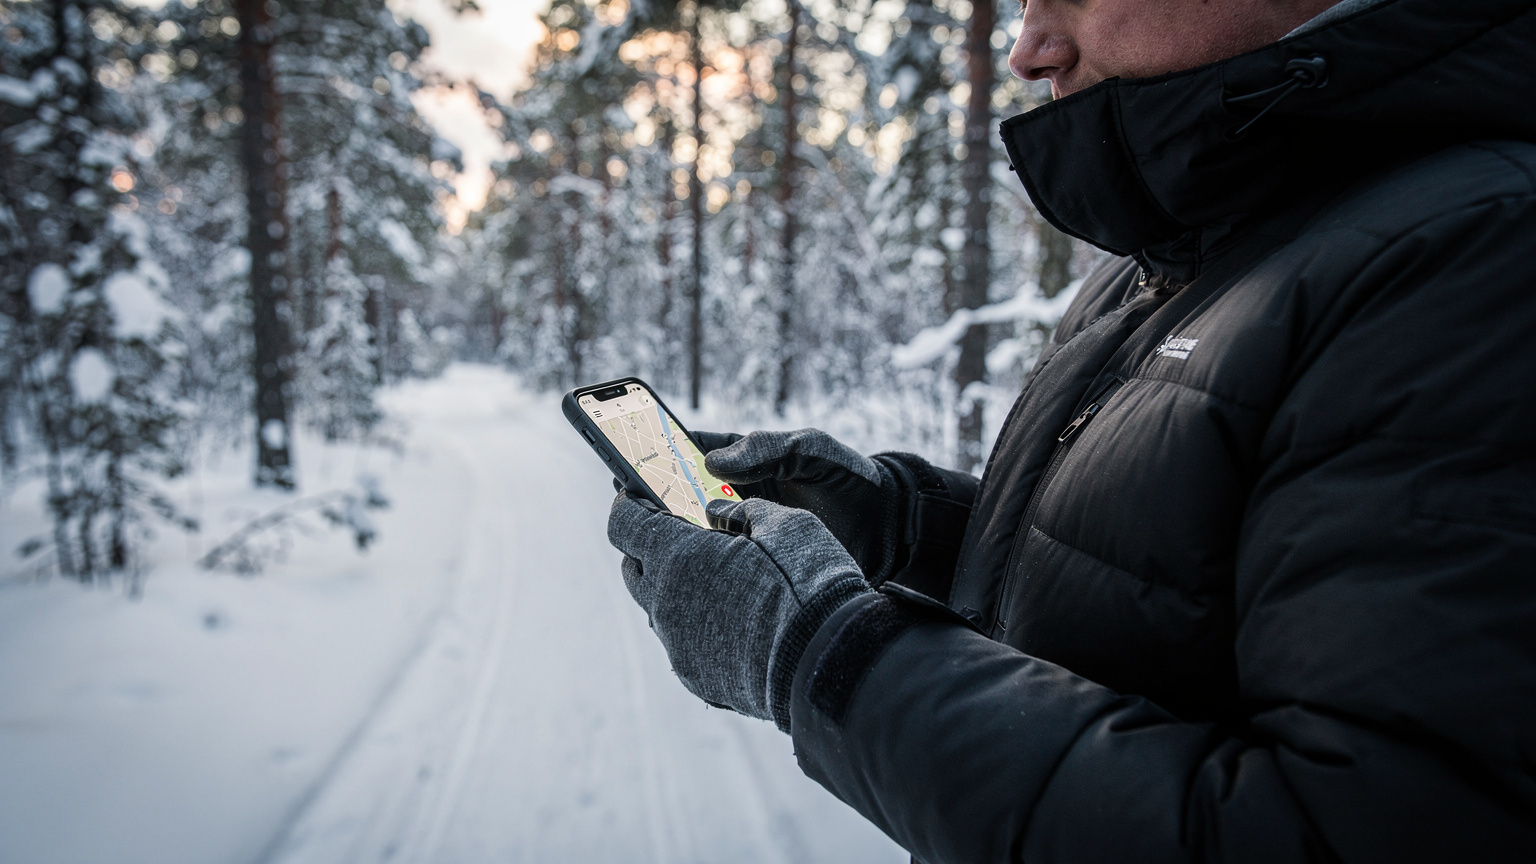
Oslo's winter sports aren't confined to one spot. You'll likely be hopping between the slopes of Tryvann at Oslo Vinterpark, cross-country skiing in Nordmarka, and perhaps even catching some ski jumping at the iconic Holmenkollen National Arena. Each location demands dependable data, not just for navigation but for safety. Imagine being halfway up a trail in Nordmarka, the light fading, and needing to check your map or call for help, only to find your connection dead. Trust me, I've been there, shivering on a mountain pass in the Dolomites with a dodgy local SIM, and it's not fun.
Why an eSIM is Your Best Bet for Oslo's Slopes
An eSIM isn't just a convenience, it's a tactical advantage for a budget traveler in a place like Norway. You land at Oslo Gardermoen (OSL), activate your plan, and you're good to go. No hunting for SIM card kiosks, no fumbling with tiny plastic cards in sub-zero temperatures. This is especially critical when you're trying to catch the Flytoget airport express train or the cheaper Vy regional train into the city, where every minute counts and you don't want to get lost trying to find platform 13.
Furthermore, an eSIM often connects to multiple local networks, offering a blanket of coverage that a single physical SIM might miss. In Norway, this usually means access to both Telenor and Telia's infrastructure, which is crucial when you're venturing out of the city limits into more remote areas like the forested trails around Sognsvann Lake (a popular spot for winter walks and cross-country skiing). This multi-carrier reliability is something I swear by, especially after a particularly frustrating experience with a single-carrier local SIM in the Norwegian Arctic where service vanished just when I needed it most, a story I covered in Norway's Arctic: Staying Connected on Remote Fjord Expeditions 2026.
Crucial Apps for Your Oslo Winter Adventure
Before you even think about hitting the slopes, load up your phone with these essential apps. They'll save you time, money, and potentially a lot of hassle. And yes, they all rely on solid data connectivity.
- RuterBillett and RuterReise: Oslo's public transport apps. Buy tickets and plan routes on the fly. Don't even think about buying paper tickets, it's a rip-off.
- YR: The Norwegian meteorological institute's weather app. Invaluable for checking snow conditions, wind chill, and potential blizzards before you head out. This is non-negotiable for safety.
- UT.no: For hiking and skiing trail maps in Nordmarka and beyond. It's often better than Google Maps for specific trails and elevations.
- Vipps: Norway's ubiquitous payment app. Many smaller shops or even some ski huts might prefer it. It's like Swish in Sweden or MobilePay in Denmark.
- Google Maps/Apple Maps: For general navigation and finding those obscure kebab stands near the train station after a long day of skiing.
eSIM vs. Local SIM: The Real Cost in Oslo
Let's talk brass tacks. Money. Everyone says local SIMs are always cheaper. Not always. Especially not in Norway, where everything costs an arm and a leg. Sure, you can get a physical SIM from Telia or Telenor, but let's break down the actual process and cost.
The Local SIM Experience: A Traveler's Gauntlet
To get a local SIM in Oslo, you're looking at a few hoops to jump through. First, you need to find a store. At Gardermoen Airport, you might find a Narvesen or 7-Eleven that sells them, but their selection is usually limited and prices are inflated. If you wait until you get to the city, you'll need to trek to a dedicated Telia or Telenor store, likely in areas like Karl Johans gate or Majorstuen. These stores usually close by 6 PM on weekdays and even earlier on Saturdays, completely shut on Sundays. If you arrive late on a Friday, you're out of luck until Monday morning.
Then there's the registration. While not as strict as some countries (like Turkey, where you practically need a blood sample), you'll still need your passport. And finally, the price. A prepaid SIM from a major carrier like Telia often starts at around NOK 200-300 (€18-€27) for the SIM itself, plus another NOK 100-200 (€9-€18) for a basic data package, giving you maybe 5-10 GB. So, you're already at €27-€45, and you've spent an hour or two of your precious travel time doing paperwork. Remember, every minute spent on admin is a minute you're not on the slopes or enjoying a cheap coffee.
The eSIM Advantage: Instant, Transparent, and Often Cheaper
This is where eSIMs shine. I usually buy a regional European eSIM package. For Oslo, I'd typically go for a plan that includes Norway, offering maybe 10GB for 10-15 days, costing around €28-€35. That's comparable, if not cheaper, than the local SIM once you factor in the base cost of the physical SIM itself. Plus, you activate it from your couch before you even leave home. This means you land, turn on your phone, and boom, you're connected. No faffing about in an airport kiosk, no worrying about store hours. It's pure convenience, and convenience has a monetary value, especially when you're on a tight schedule.
Think about the math: 10GB for 8 days. That's roughly 1.25GB per day. My typical daily usage for navigation, social media updates (mostly Instagram stories of me looking cold but happy), checking weather, and a bit of streaming music on the T-bane is around 800MB-1GB. So, 10GB is more than enough. If you’re a heavy streamer or planning to upload 4K video daily, you might need more, but for most, this is a sweet spot.
| Feature | eSIM (Example Plan: 10GB for 15 days) | Local SIM (Example: Telia Prepaid 10GB) |
|---|---|---|
| Purchase Cost | ~€28 | ~€35-€45 (SIM + Data) |
| Activation Time | Minutes, before arrival | 1-2 hours (finding store, purchase, registration) |
| Required Documents | None beyond purchase details | Passport |
| Coverage | Often multi-network (Telenor, Telia) | Single network (Telia) |
| Flexibility | Easy to switch plans/countries (e.g., if you then head to Sweden) | Tied to one country/network |
| Physical Hassle | Zero | Finding store, inserting SIM, keeping track of tiny plastic |
Choosing the Right eSIM Plan for Your Oslo Adventure
Not all eSIMs are created equal. For Oslo, you want something that covers Norway specifically, or ideally, a broader European plan if you're hitting up other Nordic countries (which, let's be honest, you probably are). I've spent enough time hopping between hostels in different countries to know that a regional plan is often the unsung hero of budget travel.
Understanding Data Needs for Winter Sports
Your data consumption for winter sports will vary. If you're just using maps and checking weather, 5GB for a week might cut it. But if you're uploading high-resolution photos and videos of your ski runs to Instagram, video calling home, or streaming music on your way to the slopes, you'll chew through data faster than you can say 'akevitt'.
My rough guide for a week of winter sports activity, assuming moderate social media and heavy mapping/weather checks, looks like this:
- Mapping (Google Maps, UT.no): 200-300MB/day (especially if caching maps offline is overlooked).
- Weather Apps (YR): 50MB/day (checking hourly updates, radar).
- Social Media (Instagram stories, WhatsApp): 300-500MB/day (photos, short videos).
- Music Streaming (Spotify, offline playlists are your friend): 100-200MB/hour (if streaming, much less if downloaded).
- Video Calls: 500MB-1GB/hour.
So, for 8 days, you're looking at a base of 800MB-1GB/day for essential use, which means 6.4GB-8GB total. Add in some buffer for those unexpected video calls or an extra upload, and a 10GB or 15GB plan is usually the sweet spot. Anything less, and you'll be rationing data like it's fresh water in the desert.
Regional vs. Single-Country Plans
Since Norway is part of the EEA, many European regional eSIMs will cover it. This is usually my go-to. If your trip involves, say, flying into Copenhagen, taking a train to Gothenburg, and then another train to Oslo (a classic budget backpacker move), a multi-country plan is a no-brainer. It saves you the headache and cost of buying multiple single-country plans. I talk a lot about this strategy in The Multi-Country eSIM Hack: Save $100+ on Your Euro Trip 2026.
| Plan Type | Pros | Cons | Best For |
|---|---|---|---|
| Single-Country (Norway) | Potentially slightly cheaper if only staying in Norway, often larger data allowances for the price. | No coverage if you visit neighboring countries, less flexible. | Dedicated trips solely within Norway, especially longer stays (2+ weeks). |
| Regional (Europe) | Seamless connectivity across multiple European countries (e.g., Sweden, Denmark, Germany), excellent for multi-stop trips. | Slightly higher per-GB cost than some single-country plans. | Travelers visiting Oslo as part of a larger European itinerary, maximum flexibility. |
| Global | Covers almost every country imaginable, ultimate flexibility for round-the-world trips. | Highest per-GB cost, often smaller data allowances. | Very long-term travelers, extreme last-minute bookings, or truly global adventurers (not ideal for a dedicated Oslo trip). |
Pre-Trip Checklist: Setting Up Your eSIM for Oslo
Getting your eSIM ready for Oslo is straightforward, but a little pre-planning goes a long way. Don't wait until you're already in the air, or worse, standing in the cold at Gardermoen, to figure this out. I've seen too many panicked travelers trying to troubleshoot connectivity issues on arrival.
Step-by-Step eSIM Activation Guide
- Check Device Compatibility: First and foremost, ensure your phone supports eSIM. Most iPhones (XS and newer), Google Pixels (3 and newer), and many newer Samsung Galaxy models are compatible. A quick search online for 'eSIM compatible phones' will confirm.
- Purchase Your eSIM Plan: Head over to a reputable eSIM provider. For a trip to Oslo, I'd look for a plan specifically covering Norway or a broader European region. You can browse options and purchase directly from the Norway eSIM page.
- Receive Activation Instructions: After purchase, you'll typically get an email with a QR code or manual activation details. Keep this email handy, or better yet, print it out or save it as a PDF on a second device.
- Activate Before You Fly: I always recommend activating your eSIM before you leave home, ideally while still on Wi-Fi. This lets you troubleshoot any issues in a comfortable environment. Go to your phone's cellular settings, add the eSIM using the QR code (or manual entry), and follow the prompts. Make sure to label your eSIM clearly (e.g., "Oslo eSIM") so you don't confuse it with your primary SIM.
- Configure Data Roaming: Once activated, ensure that your phone is set to use the eSIM for mobile data and that data roaming is enabled for the eSIM profile. You might want to temporarily disable your primary SIM's data roaming to avoid accidental charges.
- Test It: If you've activated it before leaving, toggle off Wi-Fi and see if you can access the internet using your new eSIM. This simple step can save you massive headaches on arrival.
Troubleshooting Common eSIM Issues
Even with careful planning, sometimes things go sideways. Here are a few common hiccups and how to fix them:
- No Service After Activation: Double-check that data roaming is enabled for your eSIM profile. Sometimes a quick restart of your phone can also resolve this.
- Incorrect APN Settings: Rarely, an eSIM might require manual APN (Access Point Name) settings. These details are usually provided by your eSIM provider. You can find APN settings under your phone's cellular data options.
- Slow Data Speeds: If speeds are sluggish, try manually selecting a different network operator in your phone's cellular settings. As mentioned, eSIMs often connect to multiple networks (like Telenor and Telia in Norway), so switching might give you a better signal.
- Exhausted Data: Keep an eye on your data usage! Most eSIM apps provide real-time tracking. If you're running low, you can often top up directly through the app or website.
Border Crossing and Connectivity Tricks for Norway
Norway is part of the Schengen Area, so border crossings from other Schengen countries are usually seamless. However, digital connectivity doesn't always follow political lines perfectly. If you're coming from a non-Schengen country or even just outside the EU/EEA, it's worth a quick check.
Seamless Crossings from Sweden or Denmark
If you're like me and often combine a trip to Oslo with a visit to Gothenburg or Copenhagen (because those hostels are even cheaper!), your regional eSIM should automatically switch carriers as you cross the border. I've taken the train from Gothenburg to Oslo countless times, and my data has always transitioned smoothly from a Swedish carrier to a Norwegian one (typically Telenor or Telia) without a hitch. This is the beauty of a proper multi-country eSIM.
However, I once had a friend who bought a 'Nordic Countries' physical SIM from a minor operator in Sweden, and when we crossed into Norway, it decided to stop working entirely for about 3 hours near Halden. He had to rely on my hotspot. Lesson learned: stick with reputable eSIM providers that list specific network partners for each country. Check our FAQ page for more details on carrier partnerships.
What About Coming from the Arctic?
If you're arriving in Oslo from up north, say after a remote fjord expedition in the Arctic (as detailed in my piece, Norway's Arctic: Staying Connected on Remote Fjord Expeditions 2026), you might be more sensitive to connectivity. While the major towns in Northern Norway have good coverage, venturing into truly remote areas can be challenging. An eSIM with multi-carrier support is your strongest bet here, as it maximizes your chances of picking up a signal in sparsely populated regions.
Remember, even the best eSIM can't conjure a signal where there isn't one. Always have offline maps and a fully charged power bank, especially if you're venturing into the true wilderness. Your life might depend on it.
Maximizing Your Data on a Budget, Oslo Edition
Even with an affordable eSIM, you still need to be smart about your data. Every megabyte counts when you're trying to stretch your euros.
Leveraging Free Wi-Fi Hotspots
Oslo has a decent amount of free Wi-Fi, but don't rely on it exclusively. Most hostels (Anker Hostel, Saga Poshtel), cafes (like Kaffebrenneriet or Stockfleths), and public libraries offer free Wi-Fi. The Oslo Public Library (Deichman Bjørvika) is not only architecturally stunning but also offers free, fast Wi-Fi, perfect for uploading those large video files or doing some serious research without eating into your data plan. However, public Wi-Fi can be slow, unreliable, and sometimes insecure, so it's best for non-sensitive tasks.
Offline Maps and Apps: Your Data Lifeline
This is my number one rule for budget travel: download everything you can offline. Before you leave your hostel or any Wi-Fi zone:
- Google Maps: Download offline maps for Oslo and the surrounding Nordmarka area. It's a lifesaver.
- YR: The weather app allows you to check forecasts and save them for offline viewing, though real-time radar will need data.
- Spotify/Netflix: Download your music and shows. You'll thank me when you're on a long T-bane ride to Frognerseteren.
- Offline Translation Apps: Google Translate or DeepL allow you to download language packs (Norwegian, English) for offline use. Essential for understanding bus schedules or menu items.
Data-Saving Settings on Your Phone
Your phone has a lot of built-in data-saving features. Use them!
- Disable Background App Refresh: Go into your phone settings and turn off background refresh for apps that don't need constant updates.
- Low Data Mode: Most smartphones have a 'Low Data Mode' or 'Data Saver' option that restricts background data usage and optimizes video streaming.
- Wi-Fi Assist/Smart Network Switch: Turn these OFF. You don't want your phone automatically switching to cellular data when a weak Wi-Fi signal is available, draining your plan without you noticing.
- Restrict Auto-Downloads: Ensure apps like WhatsApp or Telegram aren't set to auto-download media on cellular data.
| App/Service | High Data Use Action | Low Data Alternative |
|---|---|---|
| Maps (Google Maps, Apple Maps) | Streaming live navigation, constantly refreshing routes. | Download offline maps before heading out; pre-plan routes on Wi-Fi. |
| Social Media (Instagram, TikTok) | Auto-playing videos, uploading high-res photos/videos. | Disable auto-play; upload content only on Wi-Fi; use 'data saver' modes within apps. |
| Streaming (Spotify, Netflix, YouTube) | Streaming music/video in high quality. | Download playlists/shows for offline playback; use lower quality settings. |
| Video Calls (WhatsApp, FaceTime) | Long video calls in high definition. | Opt for audio-only calls; use Wi-Fi for video calls; keep calls short. |
Emergency Preparedness and Offline Resources
Even with the best connectivity, winter sports carry risks. Being prepared for emergencies, especially regarding communication, is paramount. This isn't just about saving money, it's about staying safe.
Emergency Numbers in Norway
Knowing these numbers by heart, or at least having them easily accessible, is crucial:
- Police: 112
- Fire Department: 110
- Ambulance: 113
- General Emergency Number (Europe): 112 (works across the EU/EEA)
Your phone with an active eSIM will always be able to dial these numbers, even if you're out of data credit, as long as there's any network signal available. This is a fundamental safety feature, but it's important to remember.
Power Banks: Your Best Friend in the Cold
Cold weather drains phone batteries faster than you can imagine. A dead phone in the wilderness is as useless as no phone at all. Always carry a fully charged power bank, especially if you're spending a full day skiing or hiking. I personally carry a 20,000mAh power bank; it's bulky but can charge my phone 3-4 times. It's a non-negotiable item for any winter trip.
Offline Communication: When All Else Fails
In truly remote areas where even multi-carrier eSIMs might struggle (e.g., deep in Nordmarka away from major trails), having a backup plan is smart. Inform someone of your route and expected return time. Consider carrying a physical map and compass if you're venturing far off the beaten path. These old-school methods can save your skin when technology fails.

Sharing Your Oslo Winter Stories: Ethically and Efficiently
You've had an epic day on the slopes, seen the northern lights (if you're lucky!), and now you want to share it with the world. Doing so efficiently and ethically, especially with your data budget in mind, is key.
Crafting Your Instagram Stories and Reels
Oslo offers endless opportunities for stunning winter content. From the panoramic views at Frognerseteren to the vibrant street art in Grünerløkka, your camera will be busy. When it comes to sharing:
- Batch Upload: Don't upload every photo and video individually throughout the day. Save them up and upload in batches when you have strong Wi-Fi (like back at the hostel or a cafe).
- Optimize Video Quality: Most social media apps allow you to upload videos in lower quality to save data. For Instagram stories, this is often imperceptible to viewers.
- Use Wi-Fi for Big Files: If you're creating a longer reel or a high-res photo dump, wait for Wi-Fi. It's faster, saves your data, and you won't be that person hogging the network at the bottom of the ski lift.
Blogging and Vlogging on the Go
If you're documenting your trip for a blog or YouTube channel, managing your data is even more critical. I often write my Substack posts offline in a text editor and only connect to Wi-Fi to publish. For video, it's a different beast.
For any significant video uploads, you'll absolutely need strong Wi-Fi. Hostels often have decent speeds, but cafes or public libraries might offer more consistent connections. If you're truly desperate for a fast upload, check out co-working spaces in Oslo, which often have enterprise-grade internet (though they usually charge by the hour or day).
Remember, while sharing your adventures is fun, the primary goal of your data should be safe navigation and essential communication. Everything else is a bonus. After all, you came to Oslo to experience the winter, not to stare at your phone screen all day. But when you do need to connect, an eSIM is the smart, budget-friendly choice that lets you focus on the snow, not the struggle.
Frequently Asked Questions
Is an eSIM better than a physical SIM card for winter sports in Oslo?
Yes, an eSIM is generally better for winter sports in Oslo. It offers instant activation, often connects to multiple local networks (like Telenor and Telia) for superior coverage in varying terrains, and avoids the hassle of finding a physical SIM store in cold weather. This means seamless connectivity from the city to the remote trails, crucial for navigation and safety.
How much data do I realistically need for a week of winter sports in Oslo?
For a week of winter sports in Oslo, a 10GB data plan is usually sufficient for most travelers. This allows for daily navigation, frequent weather checks, moderate social media updates, and some music streaming. If you plan heavy video uploads or extended video calls, consider a 15GB plan for peace of mind.
Can I use a regional European eSIM in Norway?
Absolutely. Norway is part of the EEA, so many regional European eSIM plans will include coverage for Norway. This is a great option if your trip involves visiting other Nordic or European countries, providing seamless data connectivity across borders without needing multiple SIMs.
What's the cheapest way to get mobile data in Oslo?
For a traveler, an eSIM often proves to be the cheapest and most convenient way to get mobile data in Oslo. While a local physical SIM might have a slightly lower per-GB cost, the time, effort, and potential initial setup fees for a physical SIM often make an eSIM a more cost-effective choice overall, especially for shorter trips.
How do I ensure my phone battery lasts in the cold while skiing?
To ensure your phone battery lasts in the cold, always carry a fully charged power bank. Cold temperatures drain batteries rapidly. Additionally, keep your phone in an inner pocket close to your body heat when not in use, and minimize screen time by downloading maps and entertainment offline.
Are there any specific apps I should download for Oslo winter sports?
Yes, several apps are essential. Download RuterBillett and RuterReise for public transport, YR for accurate weather forecasts (critical for safety), and UT.no for detailed trail maps in Nordmarka. Google Maps with offline maps downloaded is also crucial for general navigation.